

Browser push notifications is a great tool for driving traffic back to your website. As you might have already noticed, a lot of popular websites and blogs have integrated a browser push notification system. It’s been a month since I started using Convertifier and I am happy with the results. This tutorial focuses on integrating a browser push notification feature using Convertifier.
What is Convertifier?
Convertifier is a great tool for getting back user traffic using browser push notifications. How does it work? It’s simple. Whenever a user visits your website, he will be greeted with a Show Notifications dialog. If a user clicks on allow, push notifications will be delivered to him as soon as you publish a new article.
How to Send Browser Push Notifications – Convertifier?
Step 1: Install the Convertifier plugin from the WordPress Plugins Directory. How to Install Plugins in WordPress? After you have successfully installed the plugin, go to the Convertifier Push Settings. The overview page will guide you through the setup.

Sign Up on Convertifier Website
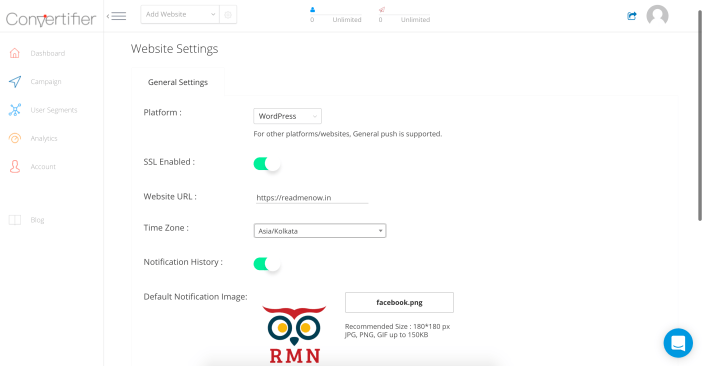
Step 2: Sign Up on the Convertifier website. In the Website Settings page, enter your website details along with your logo which acts as a fallback image. Save your settings.
Sign Up on Firebase Cloud Messaging
Step 3: Now, create a new Firebase Cloud Messaging (FCM) account. In the Firebase console, create a new Project.

Step 4: Enter your project name and the country and click on Create Project. You should be able to see your Welcome Message for the Project.

Step 5: Go to Project Settings by clicking on the gear icon in the left sidebar.

Step 6: In the Cloud Messaging tab, you will find your FCM Server key and your FCM sender ID.

Copy both the Server Key and Server ID into your Convertifier Website Integration Tab and save the settings.

Step 7: In the Integrate Website section, copy your App Key and API Token. This we will paste into the plugin settings.

Step 8: Paste your FCM ID, App Key and API Token in the plugin config settings and save it.

Step 9: Go to your homepage or any other blog post. If your configuration is proper, you should see a Show Notifications dialog box in your address bar.

Send a test notification
Step 10: To test your notifications, go to your Convertifier Admin Panel and click on Send Notification. Select General Push. Put all your notification details and click on Send Test.

You should see your notification somewhere.
Step 11: To send notifications as soon as you publish, go to your edit post. Enter your Post title and description and check Send Push notification on Published. 
That’s all. Convertifier will also send you weekly analytics on subscribers, conversions, etc through email. Let us know your reviews on Convertifier by using our comments section below.


